
How to Create a Vertical Video Ad with Snap Publisher
Learn how to reformat your existing wide-screen or square video to vertical for Snapchat.
Do you have an existing video that you want to run on Snapchat as an ad? We have the perfect tool to help you convert your current video asset into a vertical video in minutes. With the launch of our Video Conversion Tool in Snap Publisher, you can quickly and easily convert horizontal or square video into a vertical, with no video editing skills required, allowing you to run vertical video ads on Snapchat.
Convert your horizontal or square video to vertical video ads with Snap Publisher
Access Snap Publisher by going directly to snappublisher.snapchat.com or by clicking the menu in the top corner of Ads Manager and selecting 'Snap Publisher.'
Select which ad account you would like to publish your video to by clicking the dropdown in the top corner.
Click ‘Convert a Video to Vertical'
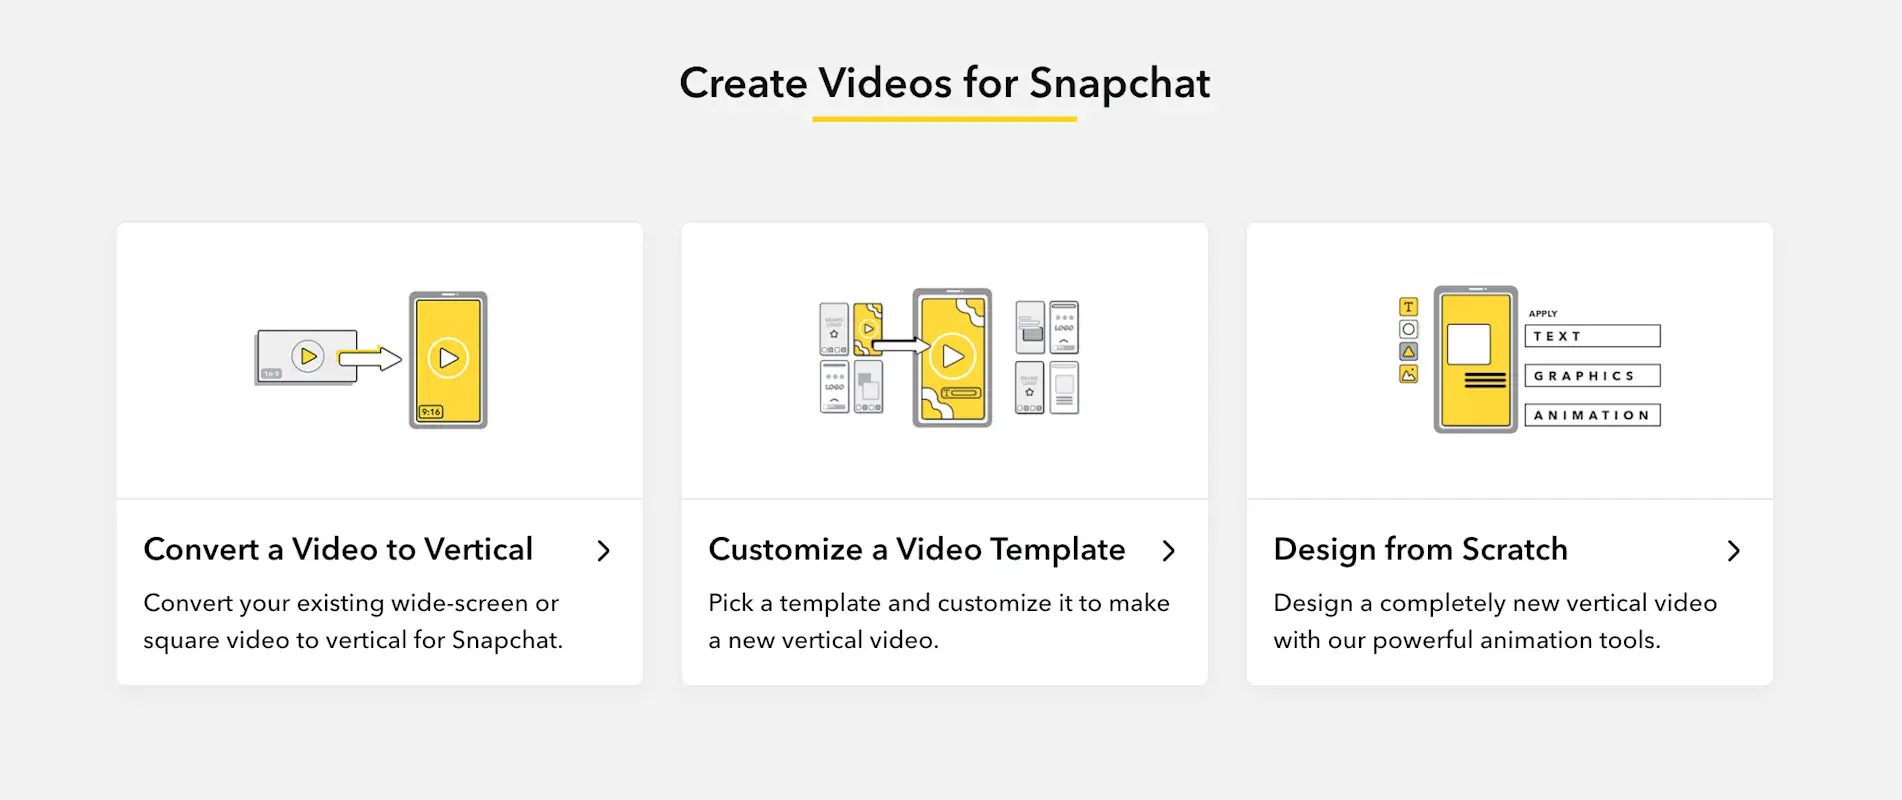
4. Click ‘Upload video’ or drag and drop your video into the tool.
Video Requirements
File format: mp4 or mov
Video codec: H.264
Audio codec: AAC
File length: up to 3 minutes
File size: up to 2GB (HD or 4k)
System Requirements:
Browser: Chrome (stable version)
Safari and Firefox not yet supported
System: at least 8GB of memory

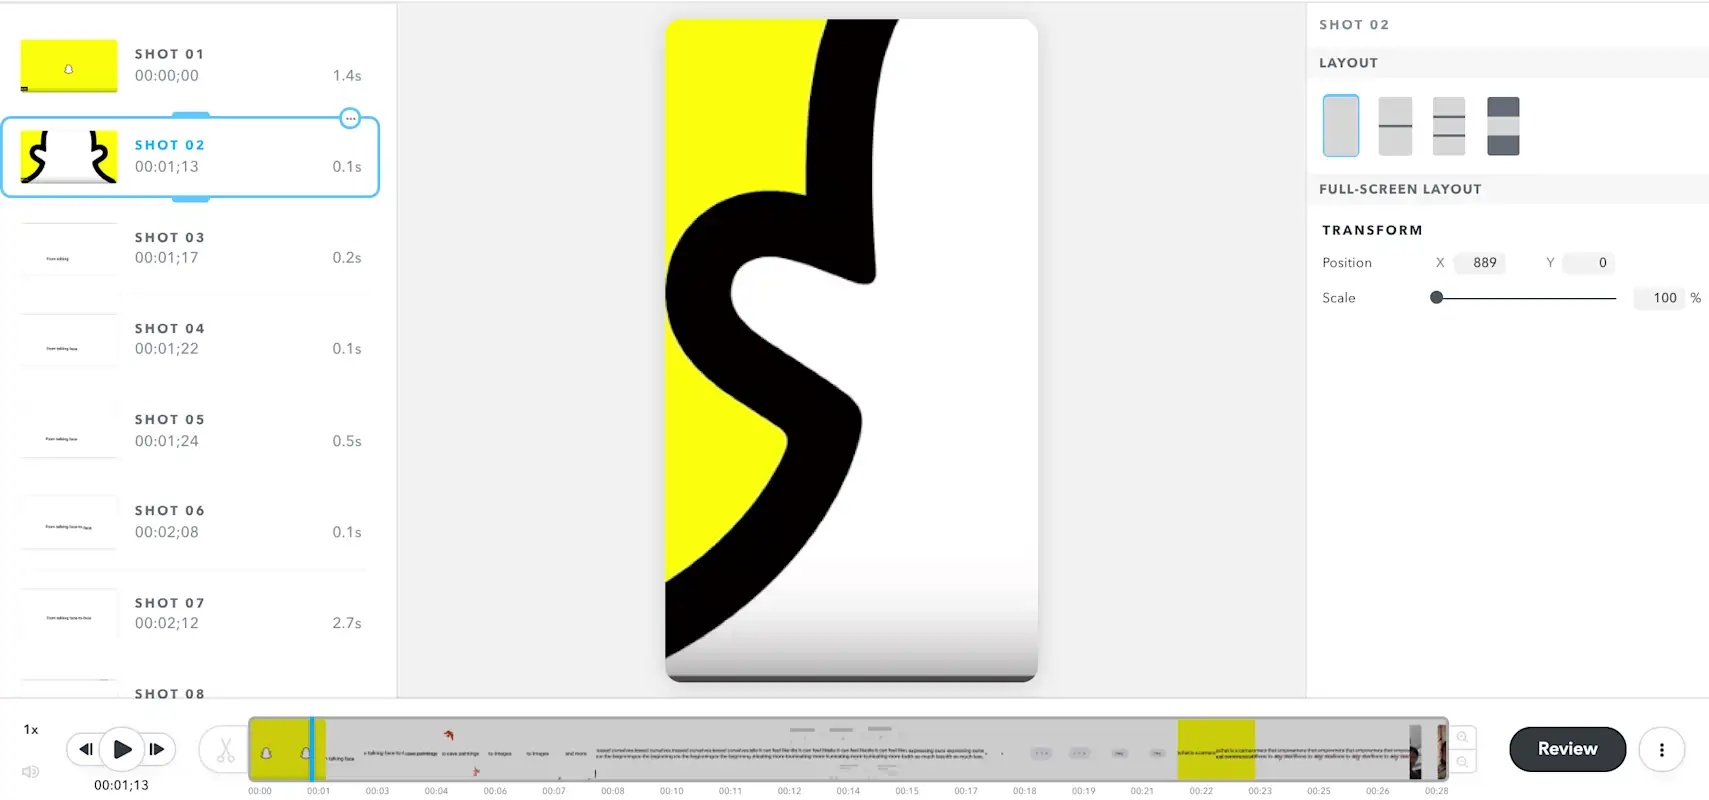
Once your video is loaded, a vertical preview will be displayed in the center. You can find a list of all the shots from the video in the left-side panel and controls to adjust the layout properties of each shot in the right-side panel. You’ll find playback controls are along the bottom of the screen.
Reformatting Your Video
If your source video has a horizontal aspect ratio, the Video Conversion tool will automatically reformat it into vertical orientation. This is done by analyzing each individual shot and automatically applying one of four supported vertical layouts. The automatic edit will not be perfect, but you are able to adjust and fix any problems you see within the tool.
You can choose between four layouts:
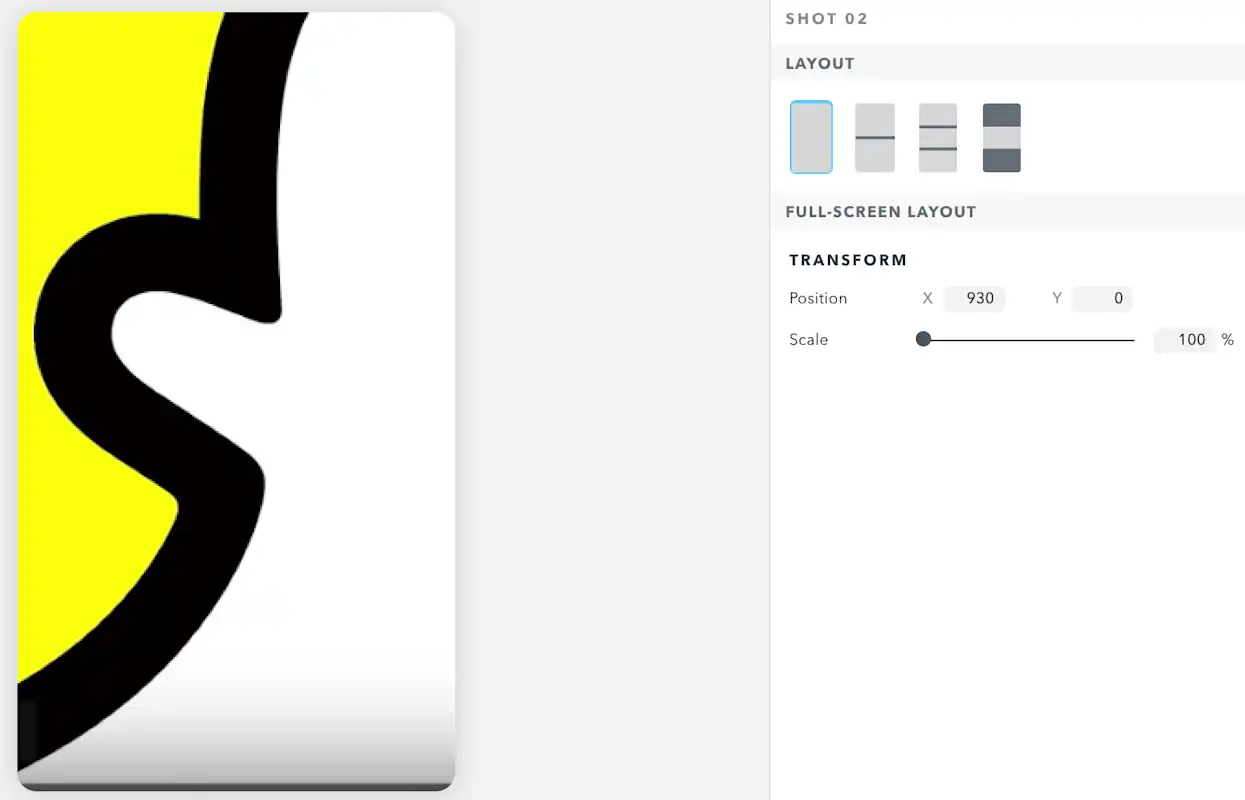
1. Full Screen: The full-screen layout is the most common vertical video ad layout. Most shots have just a single point of interest and the full-screen layout works best for these shots.
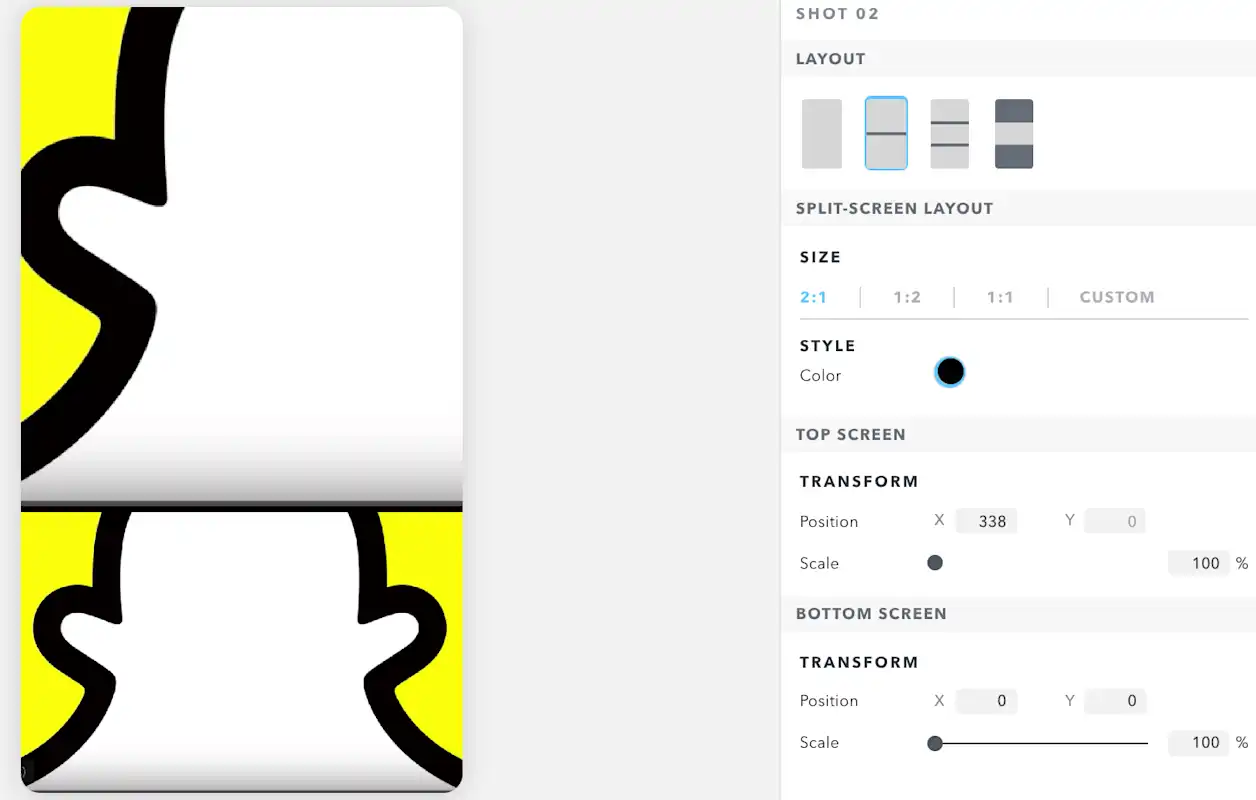
2. Split Screen: The split-screen layout can be used when there are multiple points of interest in the shot, or when there is a single point of interest that moves too much to fit in a full-screen layout.
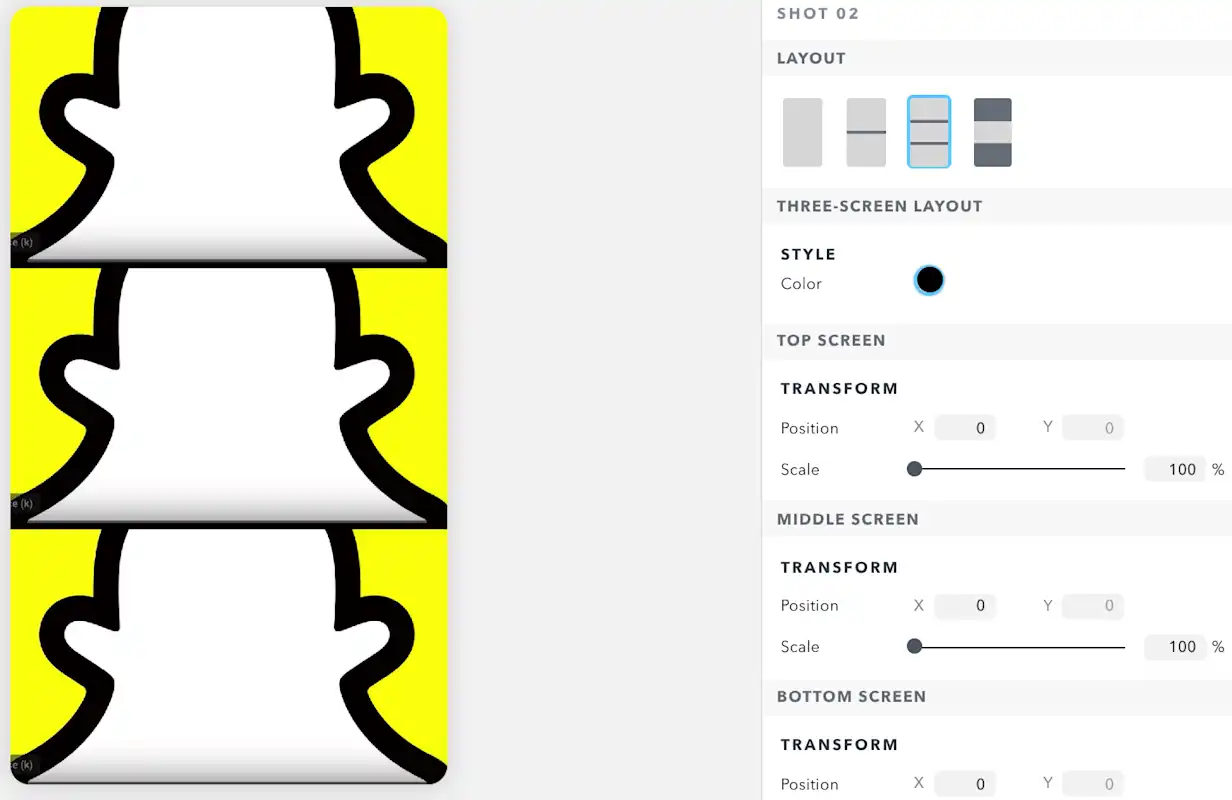
3. Three Screen: The three-screen layout can be used when the entire shot should be included in the vertical video ad layout. This can include wide-angle shots, or shots with titles or graphics that span the width of the shot.
4. Letterbox: The letterbox layout can be used in similar scenarios as the three-screen layout. Because it doesn’t make full use of the vertical screen, this layout should be used sparingly.
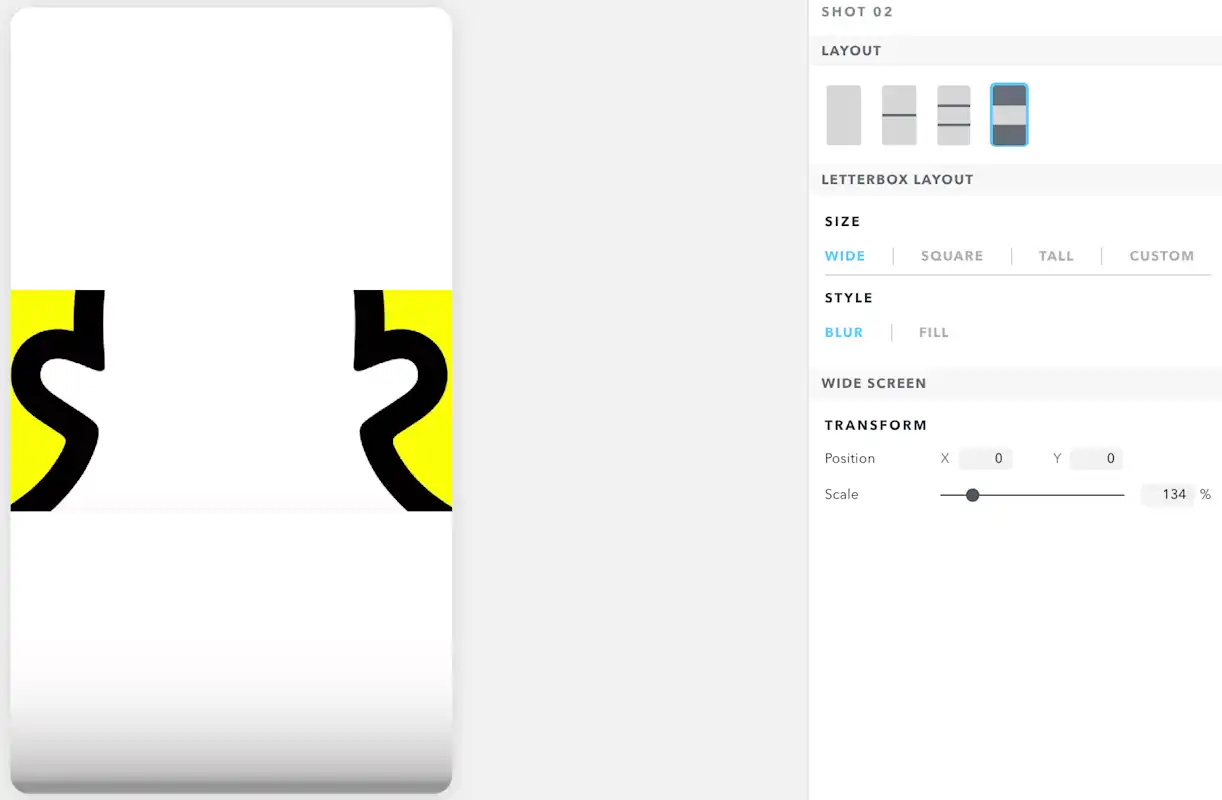
To adjust the layout of a particular shot, select it from the left-hand panel, or find the video with the timeline. Switch the layout of the selected shot by clicking one of the four layout icons in the top-right panel. Adjust the layouts in the side panel below the layout icons, or by clicking and dragging directly on views in the canvas.
Editing Shots
Each shot in the left-side panel represents a segment of video that is free of cuts or other transitions. These shots may not always correctly reflect the best cut points.
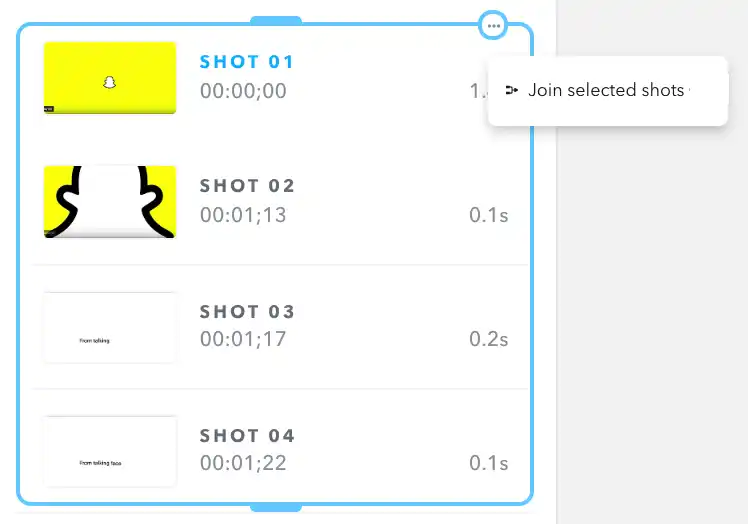
In some cases, a shot may be too short. This can happen when frames in a shot are changing very quickly (often during fast camera motion.) To lengthen a shot, select multiple shots at once and click the ... icon, then 'Join Selected Shots.'
In other cases, a shot in the panel may be too long. This can happen when the frames before and after the cut point are visually similar. To shorten a shot, adjust the playhead on the first frame after the correct cut point. The 'Next Frame' and 'Previous Frame' buttons are useful for positioning the playhead on a specific frame. The 'Split Shot' button can then be used to split the current shot into two new shots, using the current frame as the first frame of the latter shot.
Skipping Shots
You can omit sections of your source video from the vertical output video on a shot-by-shot basis. This can be useful for trimming from the start or end, or for dropping entire scenes in your source video. To do this, select one or more shots from the shot list, open the shot context menu, and check the 'Skip selected shots' entry. Skipped shots will be omitted from the output video, and skipped over during playback in the preview. You can still edit skipped shots, and you can uncheck 'Skip selected shots' any time to restore those sections of video in the output.
Chapter Breaks
Chapter breaks can be used to split your video into smaller segments, which can then be downloaded to your computer. You don’t need to create chapter breaks in your video, and they aren’t used when exporting to Ads Manager, so they are hidden by default. When chapter breaks are enabled, you can reposition them between shots by dragging and dropping; you can delete them by clicking the trash can icon on the chapter break element; and you can add additional chapter breaks from the shot context menu.
Review and Export
Once you’ve finished editing the layout of your video and adjusting the breaks, click 'Review.' button to continue to the Review and Export dialog. If you find a problem, close the 'Review' window and return to the editor. If it looks good, you can render a final, high-quality version of your vertical video for export. Rendering will happen automatically before export, and takes a few minutes.
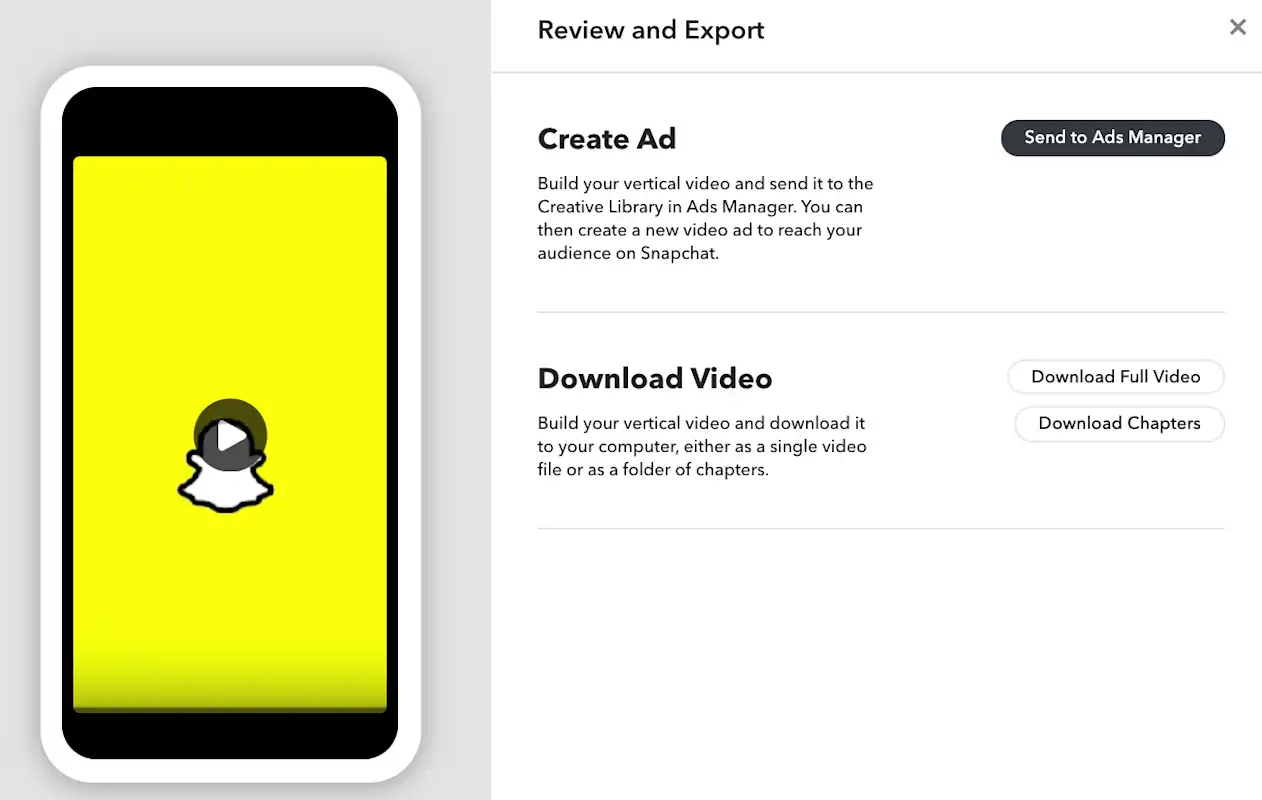
Select 'Send to Ads Manager' to export your video to the Creative Library, where you can create a campaign, and run it as an ad on Snapchat. You can choose from a variety of ad formats including Snap Ads, Commercials or Story Ads.
Select ‘Download Full Video’ to download your video as a single file to your computer
Select ‘Download Chapters’ to download your vertical video as a folder of chapters to your computer.
Have more questions? Watch this step-by-step tutorial below on how you can convert your horizontal video to vertical with Snap Publisher.
Snapchat can help your business grow.